20. EXHAUST EMISSION CONTROL
SYSTEM GRAND DINK 125/150
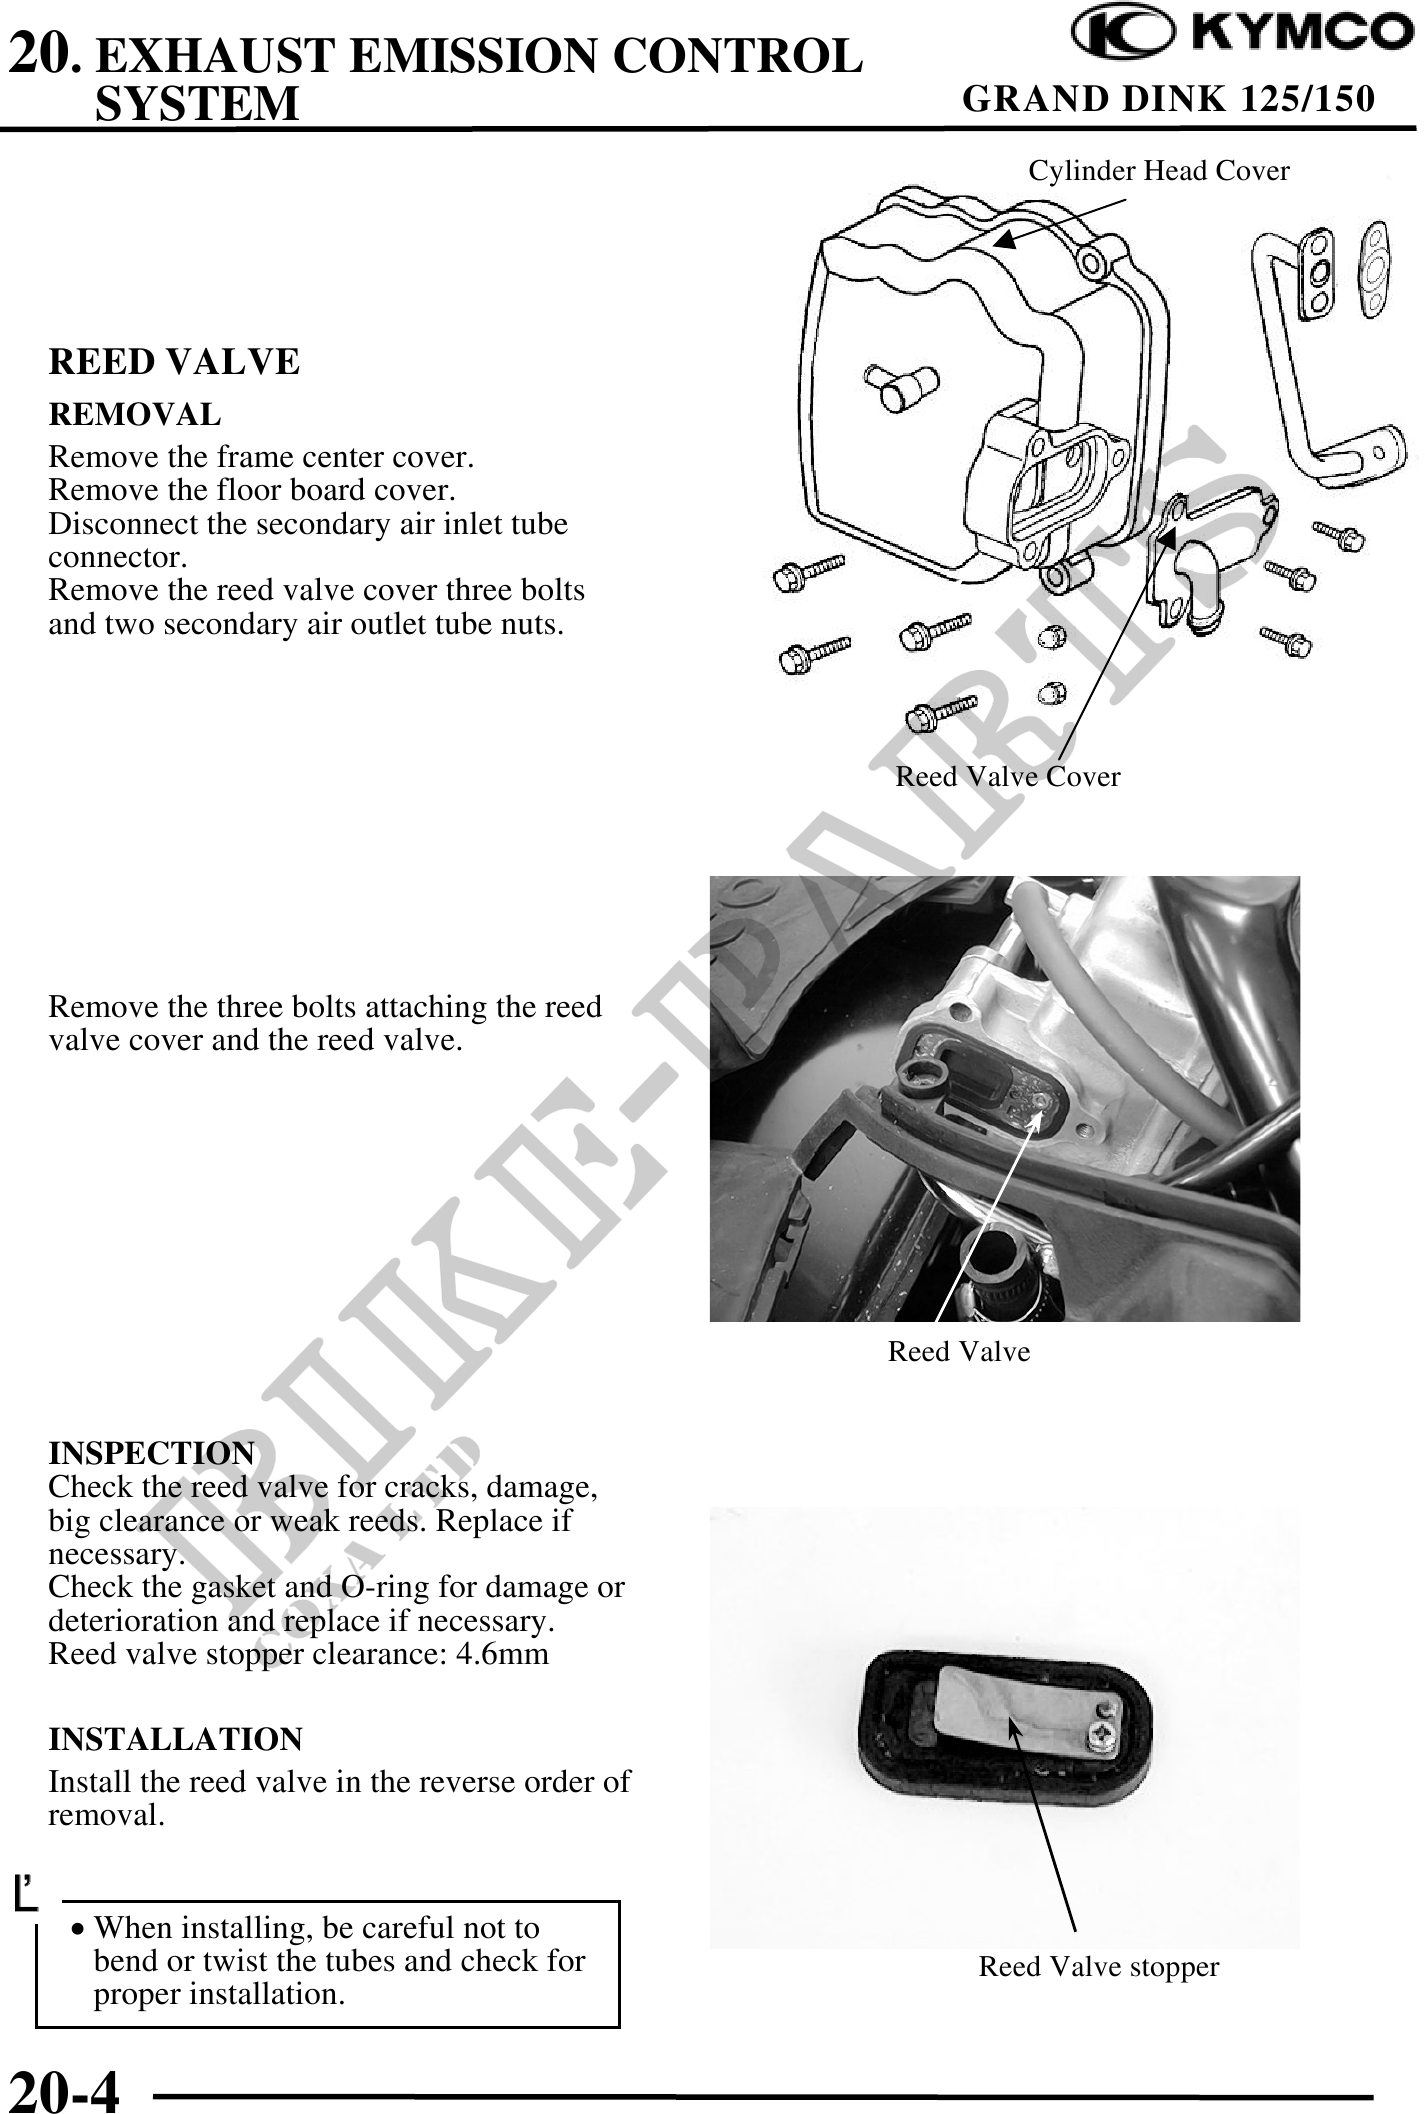
Cylinder Head Cover
REED VALVE
REMOVAL
Remove the frame center cover.
Remove the floor board cover.
Disconnect the secondary air inlet tube
connector.
Remove the reed valve cover three bolts
and two secondary air outlet tube nuts.
Reed Valve Cover
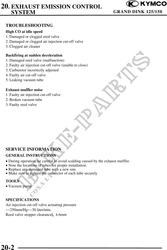
Remove the three bolts attaching the reed
valve cover and the reed valve.
Reed Valve
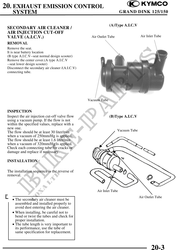
INSPECTION
Check the reed valve for cracks, damage,
big clearance or weak reeds. Replace if
necessary.
Check the gasket and O-ring for damage or
deterioration and replace if necessary.
Reed valve stopper clearance: 4.6mm
INSTALLATION
Install the reed valve in the reverse order of
removal.
Reed Stopper
· When installing, be careful not to
bend or twist the tubes and check for Reed Valve stopper
proper installation.
20-4