Ihr Warenkorb


| Beschreibung | Teile-Nr. | Anzahl |
|---|

          8. CYLINDER/PISTON                                       MXU 300/250


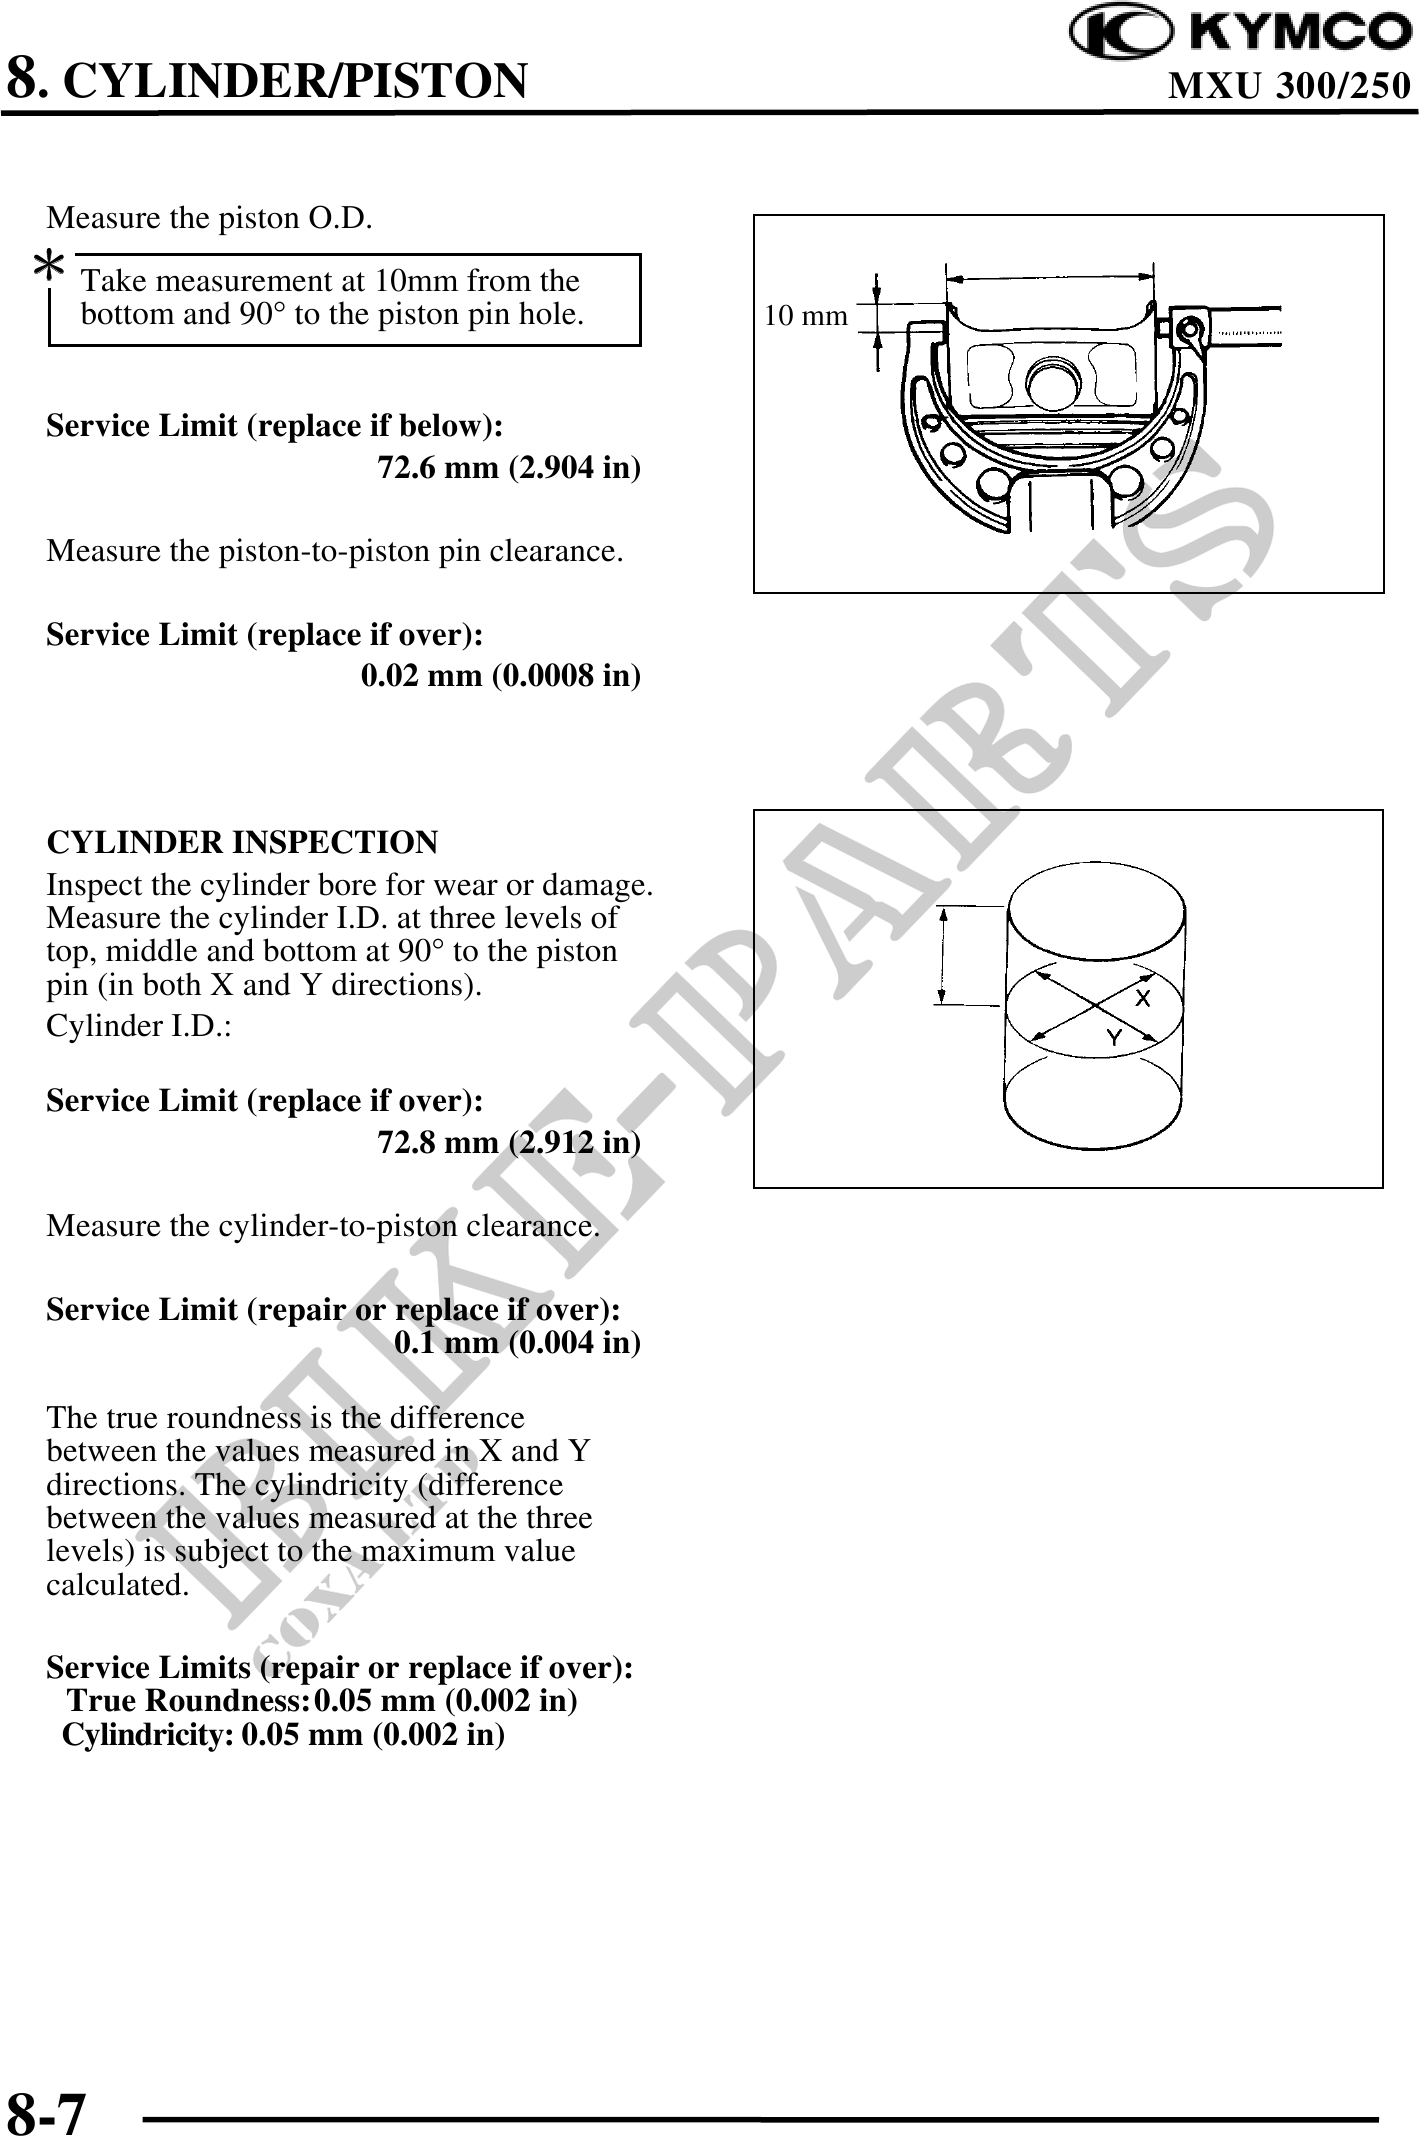
 Measure the piston O.D.
 Take measurement at 10mm from the
   bottom and 90° to the piston pin hole.        10 mm


 Service Limit (replace if below):
                         72.6 mm (2.904 in)

 Measure the piston-to-piston pin clearance.

 Service Limit (replace if over):
                       0.02 mm (0.0008 in)


 CYLINDER INSPECTION
 Inspect the cylinder bore for wear or damage.
 Measure the cylinder I.D. at three levels of
 top, middle and bottom at 90° to the piston
 pin (in both X and Y directions).
 Cylinder I.D.:

 Service Limit (replace if over):
                         72.8 mm (2.912 in)

 Measure the cylinder-to-piston clearance.

 Service Limit (repair or replace if over):
                          0.1 mm (0.004 in)

 The true roundness is the difference
 between the values measured in X and Y
 directions. The cylindricity (difference
 between the values measured at the three
 levels) is subject to the maximum value
 calculated.

 Service Limits (repair or replace if over):
  True Roundness:0.05 mm (0.002 in)
  Cylindricity: 0.05 mm (0.002 in)


8-7